Friday

Week 14

Assalamualaikum…


            At last, the day has come. Our industry day is on 16th May 2014. Our table number is 10. We have been assessed by Madam Nor Hayati and Sir Hazazuden.


Me and my partner, Mohamad Khairul Aysraf


Alhamdulillah everything was going smoothly. Thanks for everyone who help us especially to our beloved supervisor who always help and guide us in this project

Assalamualaikum..:)

Week 13

Assalamualaikum…

            It is one more week left for industry day. In this we just take the time to design a poster.  We were designing the poster by using the Microsoft publisher. The poster consists of background information of the project. With the time left, we were having last meeting with our supervisor. She had give us some comment and some improvement regarding our poster. She also gives us some useful advice about some preparation for the presentation.


Finally, all tasks had been settled and just waiting for the industry day.


Week 12

Assalamualaikum…


            There was no so much progress in this week. We just made some test on our complete project. Hence, there are some pictures and video that shows our activities.


final project testing

Week 11

Assalamualaikum…

            Finally it has come to final task in completing our project. After having a discussion with our supervisor we finally come out with an idea to prepare a parking area model. This model will help to clearly demonstrate the circuit function. Hence, after having some discussion among us we decided to buy some material for our model.


Here, I provided a picture of our finished model.

project model

Week 10

Assalamualaikum…


            After troubleshooting the circuit, finally it had performed its function. The next step is to put the circuit into the casing. To ensure that the circuit is neatly installed into the casing we had make some holes for the wire. We used some screws to attach the circuit the board into the casing. We were not facing any problem because the casing size can fit our circuit.


finished circuit place in the casing


Week 9

Assalamualaikum…


            After completing the soldering process we tested the circuit. Unfortunately the circuit cannot perform it function. To identify the circuit problem we had troubleshoot it. After some checking we have identified that there are the infrared LED sensor which have been wrongly assemble by misidentified it polarity. We then removing it back and placed it according to the correct connection and finally the circuit have function.


troubleshooting the circuit

Week 8

Assalamualaikum and have a good day…

            After completely prepare the board, we then proceed to the next step to assemble and solder all the components on the board. In assembling the components we had to ensure that all components were placed at the right place. Long nose is used to ease us holding the tiny component. We are not having so much trouble as we have first identified all the components before putting them on the board.


            Next, we moved to soldering process. The process was about attaching the components on the board by using tin. It is important for us to ensure that the soldering iron heat can be used to melt the tin. The soldering iron and the tin are placed near to the pin of the component to attach the component on the board.

 assembly the components

soldering process

Week 7

Assalamualaikum everyone..

We are not having so much progress in this week. After the etching process that we had done last week we continue to drill the board. We just did this on weekend and it does not need a long time to complete this process. Drilling the pcb is the process where we are making the hole on the board. This step is very important as we need all the holes to mount the components needed.


Here are some pictures of the activities.

 drilling machine tool kit

drilling process

Week 6

Assalamualaikum..

            We already in week 6 and its good for us that everything smoothly on the right track. In this week we continue our project progress with etching process. Etching is a process where the copper is removed from the board by using an acid. The board is immersed on the acidic solution and let the solution to run through. The acidic solution is formed by mixing some needed amount of acid powder and water. The amount of powder used is determined by the size of board to be etched.


Here, I have provided some picture regarding the etching process.

 etching process

finished etch board

Week 5

Assalamualaikum..

Early in this week we are proceeding to the next process which is transferring the circuit on the pcb board. Firstly, we print the designed circuit on the transparent paper. We make more than one copy as it is not easy to get the toner of the designed circuit attached fully on the pcb board.


As printing the circuit do not take long time, we continue to transfer the toner on the board. This is most difficult process as we have to ensure that the toner properly attached to the board. We choose to iron it rather than use the UV light as we can just do it in our room.

           printed circuit design 

transferring toner to the board

 toner attached to pcb board


Week 4

Assalamualaikum and have a good day…

            This week will be the first week for us to start preparing the circuit on the pcb board. Designing the circuit was the first step to be taken before proceed our project progress. In designing the circuit, we had used software named proteus. We were not having so many problems in using the software as we had already learnt how to deal with it in our past Engineering Design subject on last semester.


program used to design circuit

receiver circuit

transmitter circuit

Week 3

Assalamualaikum..
            We are not having so much progress in this week. After ensuring that the tested circuit can perform its function, we were having another discussion with our supervisor. It is good for us as she were satisfied with our work. Then, she asked us to transfer the circuit on the pcb board.


            We had made the decision to buy another set of component. We planned not to use the previous tested circuit. We want to use it as a backup if there were any unpredictable situation in our project progress.

Week 2

Assalamualaikum..
            Now, it is the second week and with all components that we had bought we start to construct the circuit. The circuit is to be tested first so we were asked by our supervisor to construct it on the breadboard first. For your information our project consists of transmitter and receiver circuit. Hence, we have constructed them on the different breadboard as the receiver circuit has more components than the transmitter circuit.


            Here, I have provided some pictures of our activity and also a video of tested circuit. Fortunately, the circuit can perform its function.

constructing circuit on breadboard

 finished constructed circuit

testing process

Week 1

Assalamualaikum everyone, as I had promised before I will update more on our project progress. This is first week in for this semester. Hence, my partner and I just take this time to have a meeting with our supervisor, Madam Zaridah Bt Mat Zain. We briefly explained about our project to her. She had asked us to make a first step to buy all needed components.


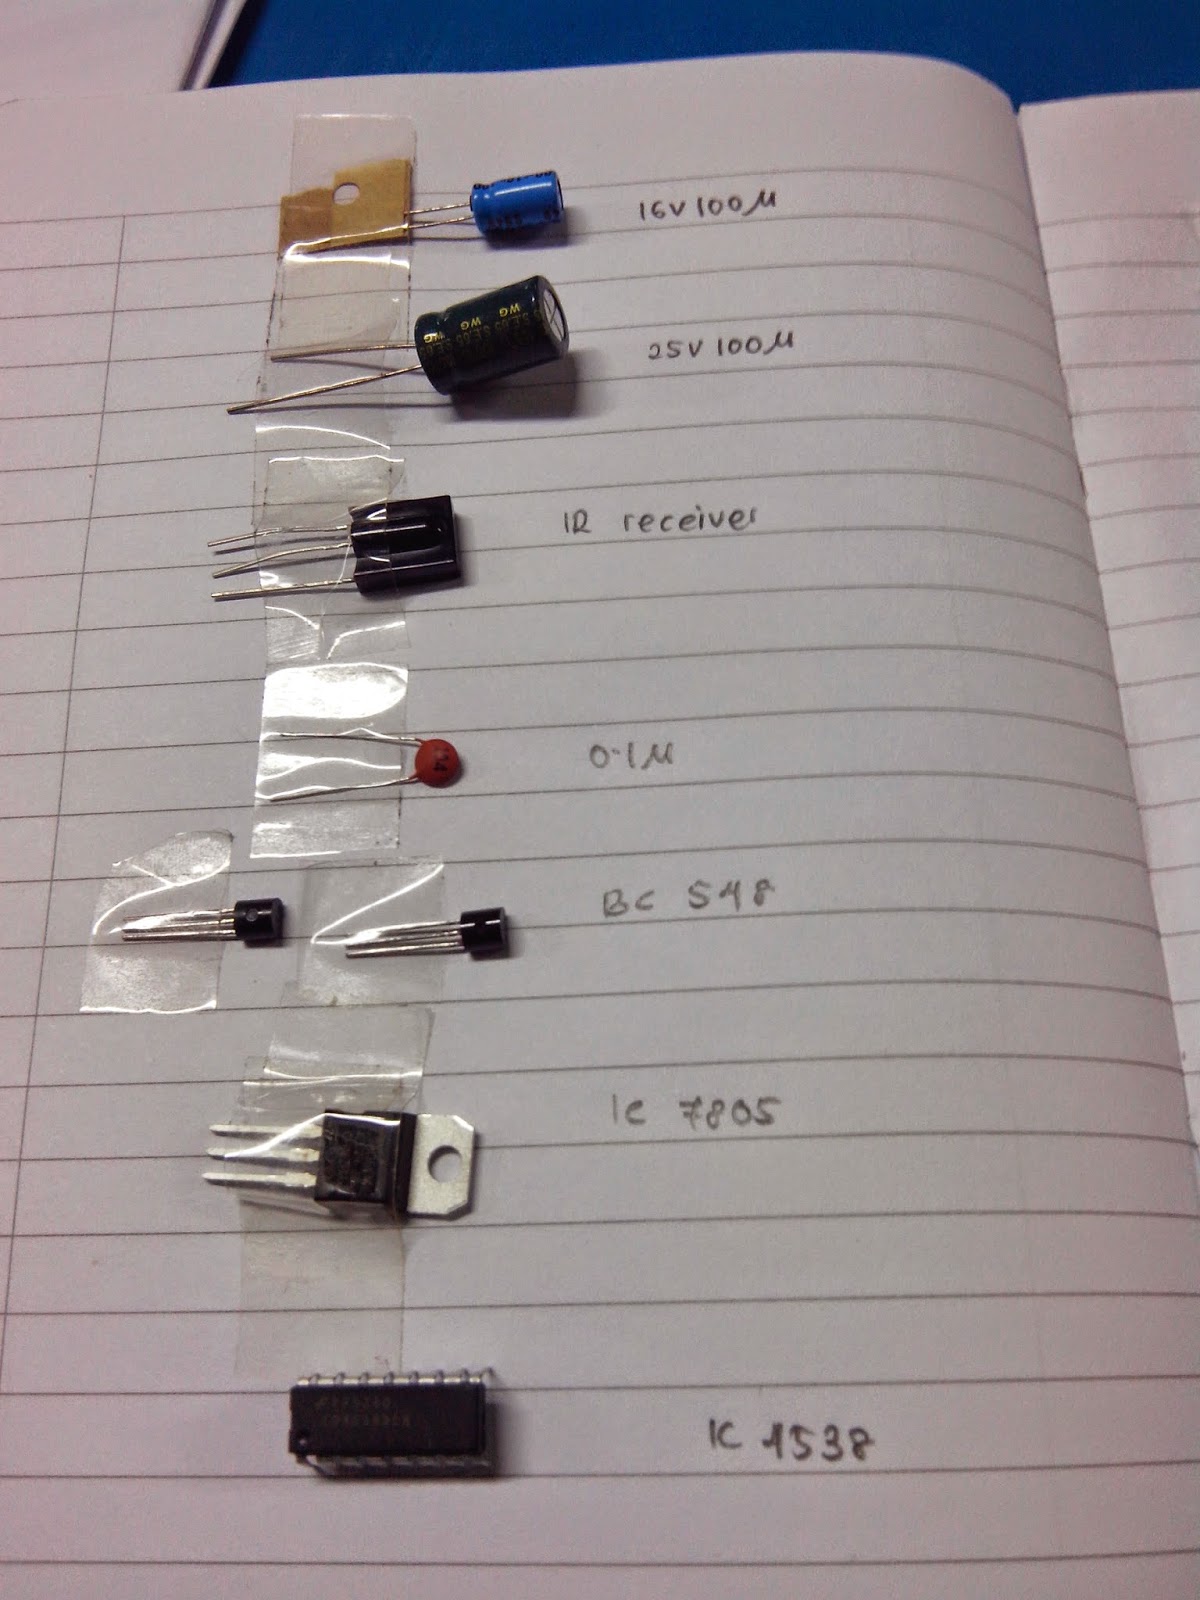
            We also agreed to have a discussion with her every week on Friday as it was her free time. She also asked us to test the circuit whether it can perform the function or not to make it easy to find a possible solution. Here, I have provided some pictures of the component.


components need for the project

Introduction

Assalamualaikum and good day to to everyone. Today, is the first time for me in updating my blog. In this opportunity, I would like to introduce my group member. My name is Khairunnisa Binti Mat Rahim, Unikl student in diploma Engineering Medical Electronics. Then, my partner Mohamad Khairul Aysraf Bin Mohamad Akhir diploma Engineering Electrical Electronics. in this final semester we are required to fulfil the Final Year Project by creating a product related to our field of study.

            Here, I would like to briefly explain our project. The project title is “Automatic Lighting System”. The project is about switching on the bulb automatically with the function of infrared sensor. Generally, this kind of project can be implemented at any places such as store, portico and etc. However, in this project we choose to put it at the parking area.


For our project progress I will update more next week.